Free Sunflower Crochet Pattern
Free Flower Crochet Pattern – Sunflower with 2 Layers
Skill Level
Beginner to Intermediate
Estimated Time
4 Hours
Pattern Type
Crochet Flower
Free Sunflower Crochet Pattern
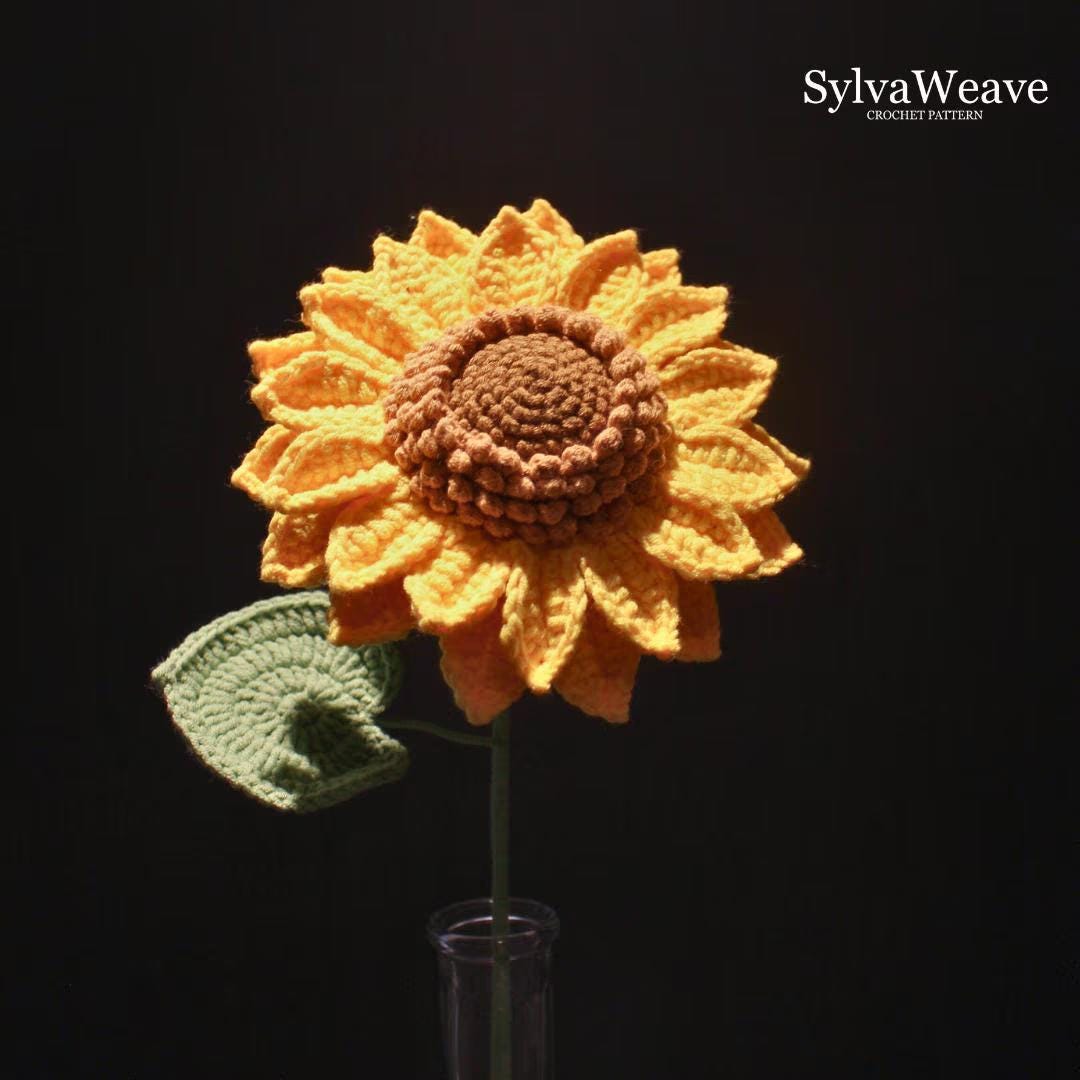
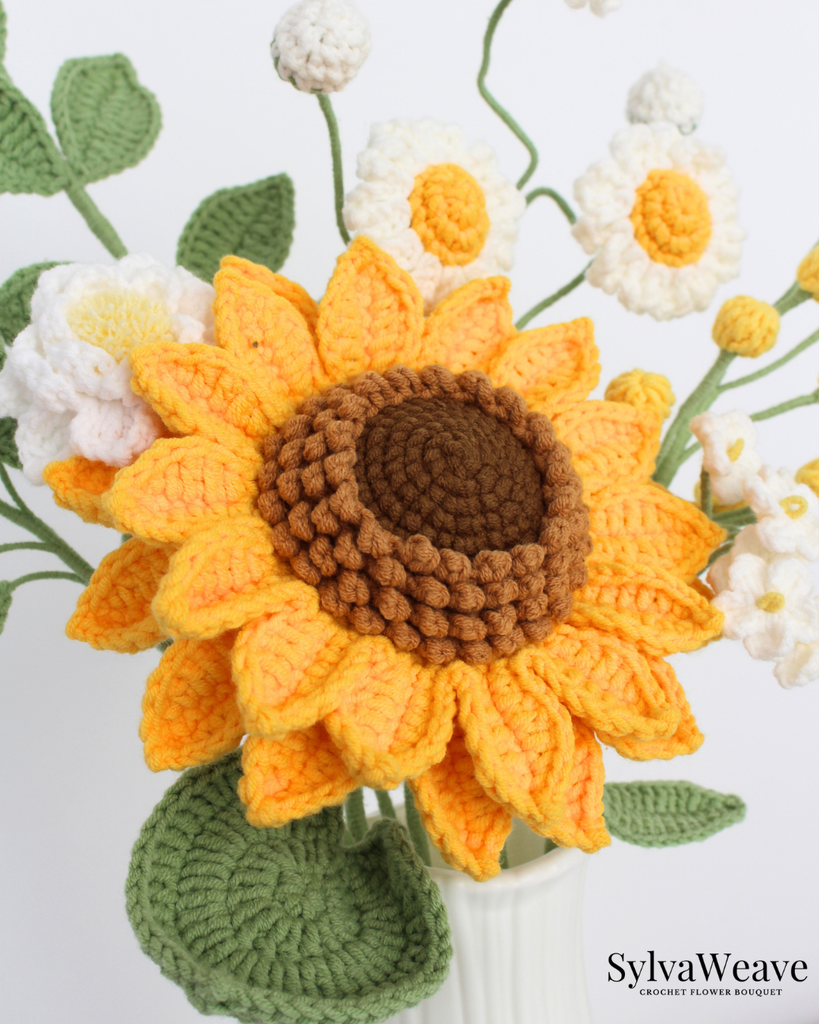
Create a charming floral home decoration with this free Sunflower crochet pattern. The design combines a dense brown circular center base, textured seed-ring accents, and 24 vibrant golden petals shaping the outer edge. Choose your favorite yellow, gold, and brown tones to create a unique coaster that matches your home décor.
This step-by-step tutorial includes the written pattern in US crochet terms, materials and tools, detailed photos, and a video tutorial. Follow along from crocheting the circular dark brown seed center to adding the inner textured ring and shaping each pointed sunflower petal. The finished Sunflower Coaster is perfect for late summer and autumn décor, warm rustic table settings, Mother’s Day gifts, housewarming gifts, or adding a cheerful handmade floral touch to your home.
🌷Pattern at a Glance
| Pattern Details | Information |
|---|---|
| Pattern Name | Sunflower |
| Pattern Type | Crochet Flower |
| Skill Level | Beginner to Intermediate |
| Estimated Time | 4 Hours |
| Crochet Terms | US Crochet Terms |
| Main Technique | Working in BLO/FLO, multi-layered chain base, wired petal edging, surface chain seed loops, and stem wrapping assembly |
| Construction | Worked in 5 individual sections: stuffed seed center, textured surface seed loops, 14 small inner petals, 14 large outer petals, 14-sepal green flower base, and wired leaf |
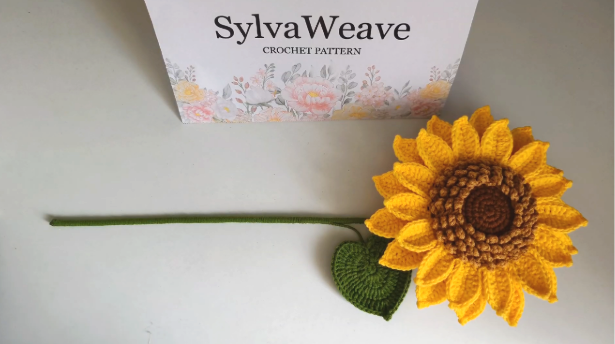
| Finished Project | One full 3D layered Sunflower on a flexible floral stem |
| Best For | Floral arrangements, desk potted decor, Mother’s Day gifts, wedding bouquets, and long-lasting handmade floral gifts |
| Written Pattern | Included |
| Step-by-Step Photos | Included |
| Video Tutorial | Included |
| Hook Size | 2.0 mm or 2.5 mm |
| Yarn Type | 4-ply cotton yarn (Dark Brown, Sand Brown, Bright Yellow, and Green) |
🌻 About This Crochet Pattern
This free crochet pattern will guide you step by step through making a beautiful 2-layer sunflower. Feel free to customize the yarn colors and create a sunflower that is uniquely yours.
Please note: This pattern is for personal use only and may not be copied, shared, redistributed, or sold without permission from SylvaWeave. If you come across someone copying, sharing, or selling this pattern without authorization, please let me know at info.sylvaweave@gmail.com. As a thank-you for helping protect my original designs, I’ll be happy to send you a FREE SylvaWeave Flower Pattern.
🧶 Materials & Tools
- 4 Ply Cotton Yarn
- Crochet Hook (2.0 / 2.5 mm)
- Hot Melt Glue
- Scissors
- Needle-Nose Pliers
- Stitch Markers
- Flower Rod (25–30 cm, 2 mm thick)
- Wire (0.2 / 0.3 mm thick)
I also offer yarn suitable for this project, which you can have a look at here. However, you are also welcome to use any yarn compatible with a 2.5 mm crochet hook. Different yarn types may create slight variations in texture, structure, and the overall appearance of your finished sunflower.
📖 Crochet Abbreviations
MR – Magic Ring
ch – Chain
sl st – Slip Stitch
sc – Single Crochet
hdc – Half Double Crochet
dc – Double Crochet
tr – Truble Crochet
inc – Increase
st – Stitch
sk – Skip
Rnd – Round
FLO – Front Loop Only
BLO – Back Loop Only
FO – Fasten Off
🎥 Video Tutorial
Prefer to crochet along with me? Watch the complete step-by-step video tutorials below.
Part 1
Part 2
🌻 Free Sunflower Crochet Pattern
A – SUNFLOWER
A1 – Flower Center
Make 1 · Using brown yarn
- Rnd 1: MR, 6 sc in MR, sl st (6)
- Rnd 2: ch 1, inc × 6, sl st (12)
- Rnd 3: ch 1, {1 sc, inc} × 6, sl st (18)
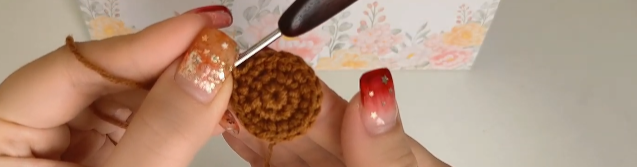
- Rnd 4: ch 1, {1 sc, inc, 1 sc} × 6, sl st (24)
- Rnd 5: ch 1, {3 sc, inc} × 6, sl st (30)
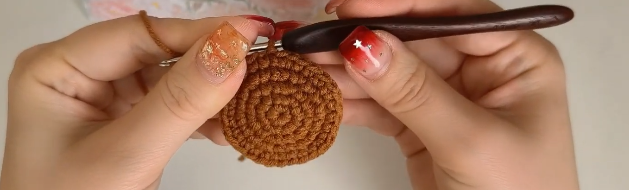
Rnd 6–10: Work in BLO only.
- Rnd 6: ch 1, {2 sc, inc, 2 sc} × 6, sl st (36)
- Rnd 7: ch 1, {5 sc, inc} × 6, sl st (42)
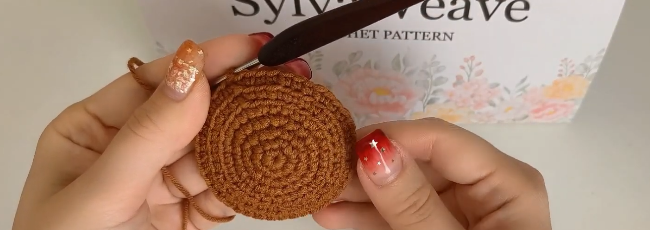
- Rnd 8: ch 1, {3 sc, inc, 3 sc} × 6, sl st (48)
- Rnd 9: ch 1, {7 sc, inc} × 6, sl st (54)
- Rnd 10: ch 1, 54 sc, sl st, FO, leave a tail for sewing (54)
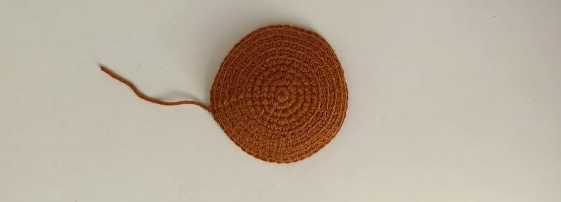
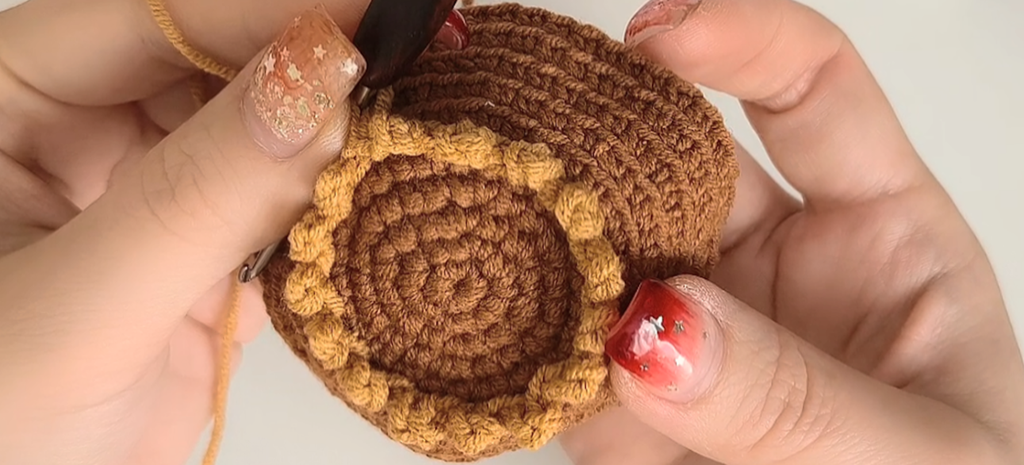
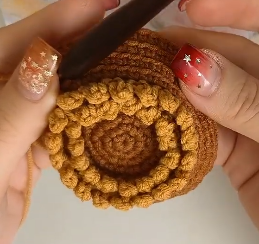
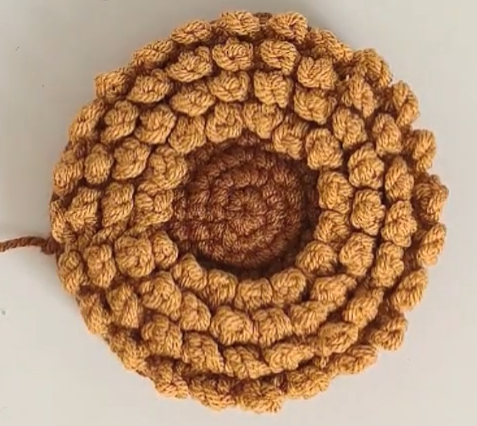
A2 – Seed Part
Make 1 · Change to sand brown yarn
Return to Rnd 5 of the Flower Center and work in FLO only.
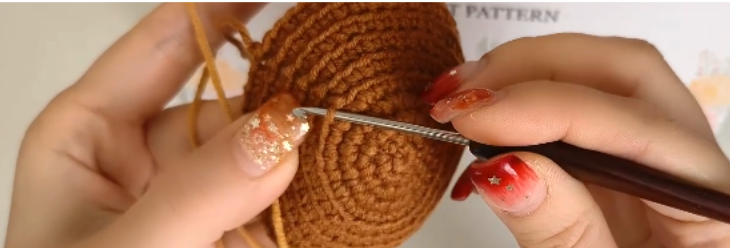
- Rnd 5–8: {3 ch, sl st at base of ch, sk 1, sl st in next st} around.
- FO and leave a tail for sewing at the end of the seed part.
A3 – Small Petals
Using yellow yarn
Return to Rnd 9 of the Flower Center and work in FLO only.
- Rnd 9: {8 ch, starting in 2nd ch from hook: 7 sc, sk 2, 2 sl st} × 14, sl st (14 petals)
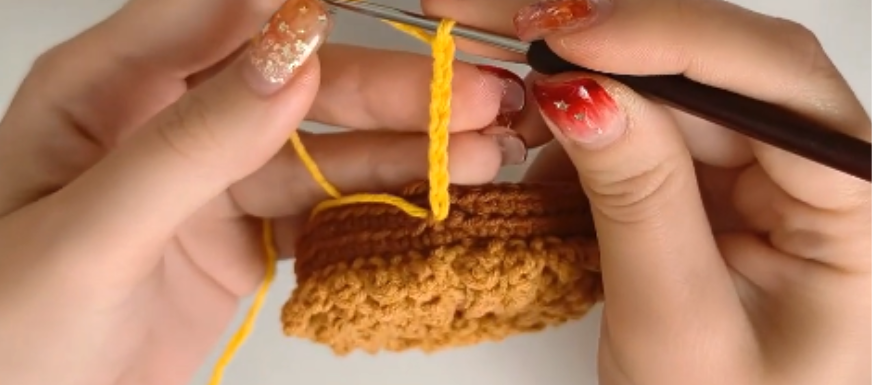
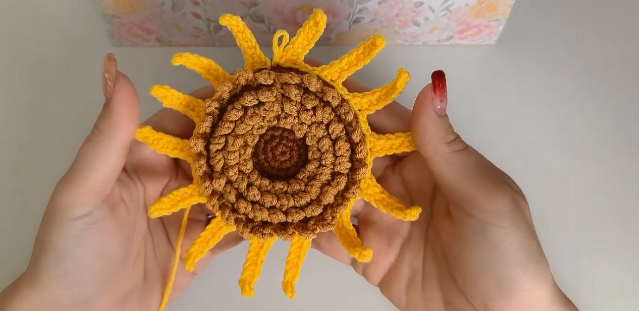
Making the Petal Edging
- Rnd 10: Add wire. ch 1, {1 sc, 1 hdc, 3 dc, 1 hdc, 1 sc, (1 sc, 1 ch picot, 1 sc) in same st,
working on opposite side: 1 sc, 1 hdc, 3 dc, 1 hdc, 1 sc, sk 2, sl st} × 14, sl st, FO, leave a tail.
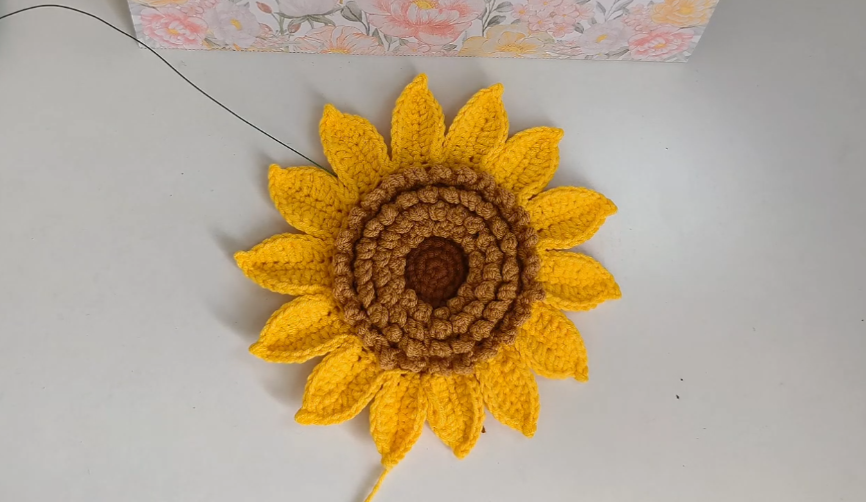
A4 – Large Petals
Using yellow yarn
Return to Rnd 10 of the Flower Center and work in FLO only.
- Rnd 10: {10 ch, starting in 2nd ch from hook: 9 sc, sk 2, 2 sl st} × 14, sl st (14 petals)
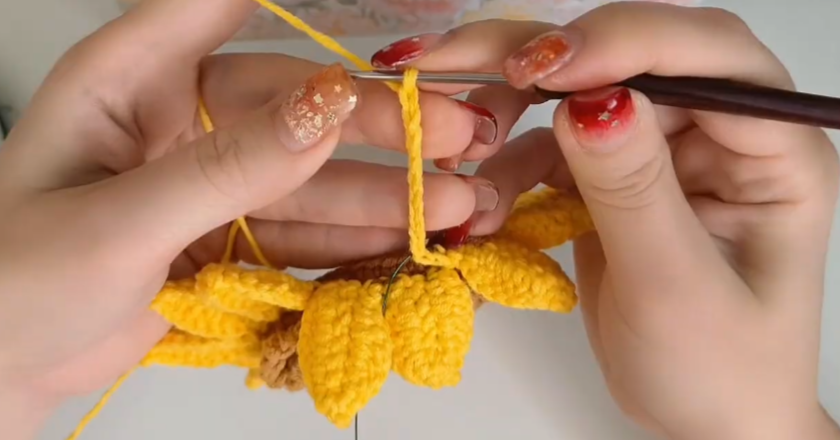
Making the Petal Edging
- Rnd 11: Add wire. ch 1, {1 sc, 1 hdc, 5 dc, 1 hdc, 1 sc, (1 sc, 1 ch picot, 1 sc) in same st,
working on opposite side: 1 sc, 1 hdc, 5 dc, 1 hdc, 1 sc, sk 2, sl st} × 14, sl st, FO, leave a tail.
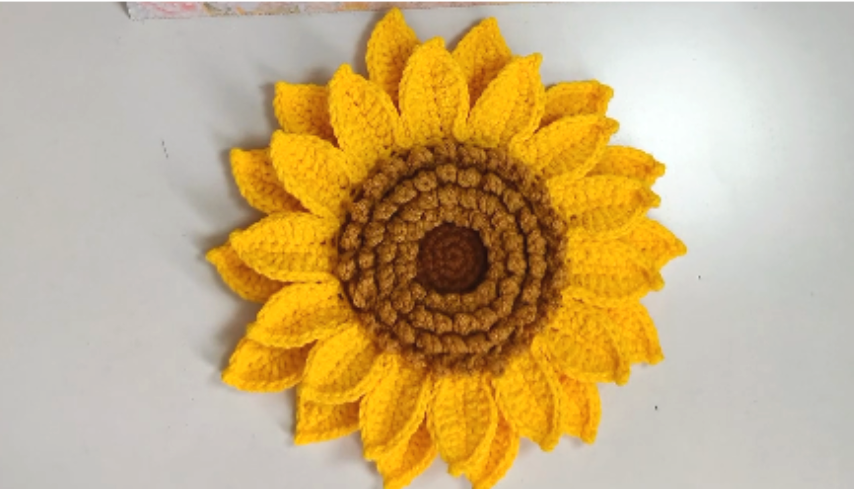
A5 – Flower Base
Make 1 · Using green yarn
- Rnd 1: MR, 6 sc in MR, sl st (6)
- Rnd 2–4: ch 1, 6 sc each rnd, sl st (6)
- Rnd 5: ch 1, inc × 6, sl st (12)
- Rnd 6: ch 1, {1 sc, inc} × 6, sl st (18)
- Rnd 7: ch 1, {1 sc, inc, 1 sc} × 6, sl st (24)
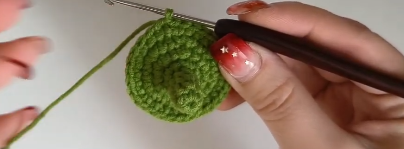
- Rnd 8: ch 1, {3 sc, inc} × 6, sl st (30)
- Rnd 9: ch 1, {2 sc, inc, 2 sc} × 6, sl st (36)
- Rnd 10: ch 1, {5 sc, inc} × 6, sl st (42)
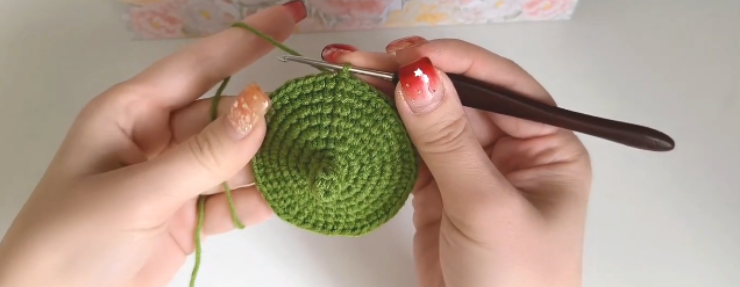
- Rnd 11: ch 1, {3 sc, inc, 3 sc} × 6, sl st (48)
- Rnd 12: ch 1, {7 sc, inc} × 6, sl st (54)
- Rnd 13: ch 1, 54 sc, sl st (54)
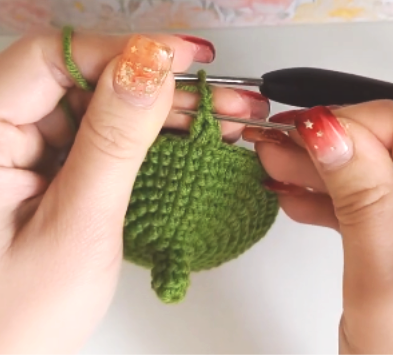
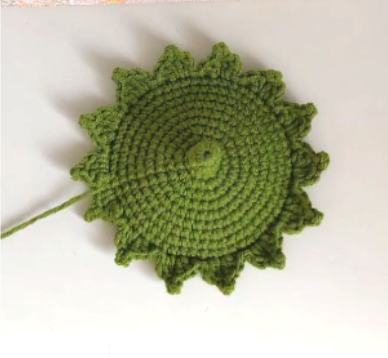
Making the Petal Edging and Work in FLO only
- Rnd 14: ch 1, (FLO) {ch 1, (dc inc, 2 ch picot) in same st, dc inc, sl st, sk 1, sl st} × 14, sl st,
FO, leave a tail. (14 sepals)
B – Leaf
Make 1
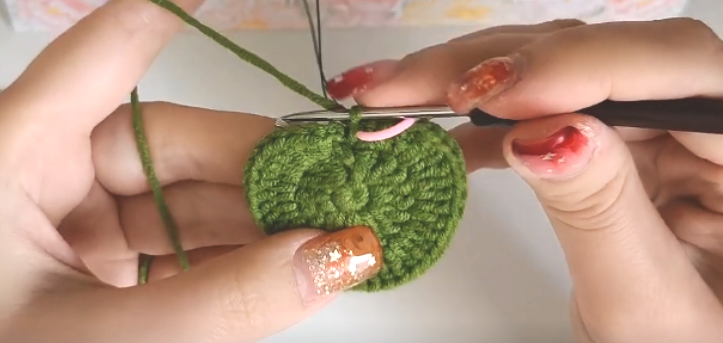
- Rnd 1: MR, 7 sc in MR, sl st (7)
- Rnd 2: ch 2, 3 dc in same st, dc inc × 2, 3 tr in same st, dc inc × 2, 3 dc in next st, ch 2,
sl st to the first sc of Rnd 1. - Rnd 3: Add wire. ch 2, sc, hdc, 3 dc in same st, dc inc × 6, 3 dc in same st,
dc inc × 6, 3 dc in same st, hdc, sc, ch 1, sl st to last ch of Rnd 2.
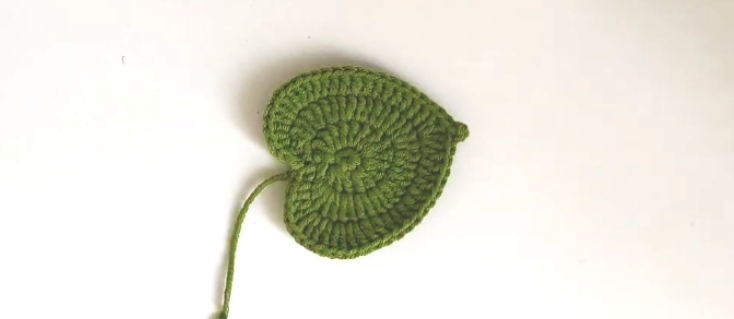
- Rnd 4: ch 2, sc, hdc, dc inc × 5, 11 dc, (dc, tr, ch 2 picot, tr, dc) in same st,
11 dc, dc inc × 5, hdc, sc, ch 1, sl st to last ch of Rnd 3.
🌿 Assembly
Step 1. Insert the stem through the flower base and secure it with a small amount of glue.
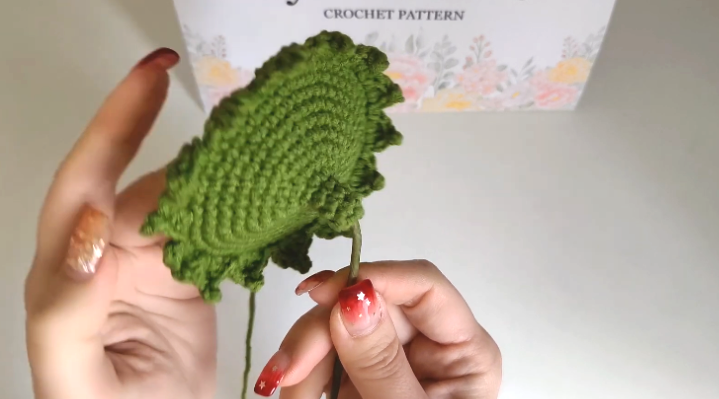
Step 2. Using the remaining yarn from the flower base, sew the flower center to the base through the BLO, adding fiberfill stuffing at the same time to shape the flower.
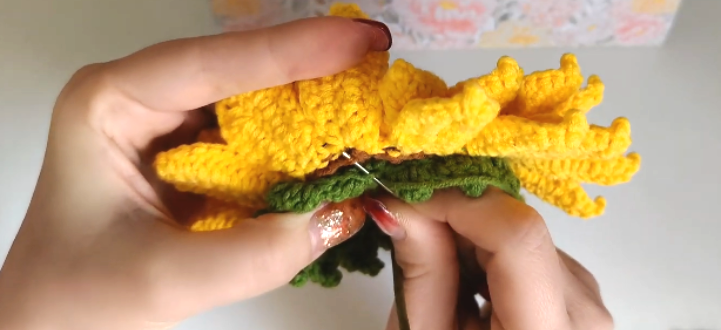
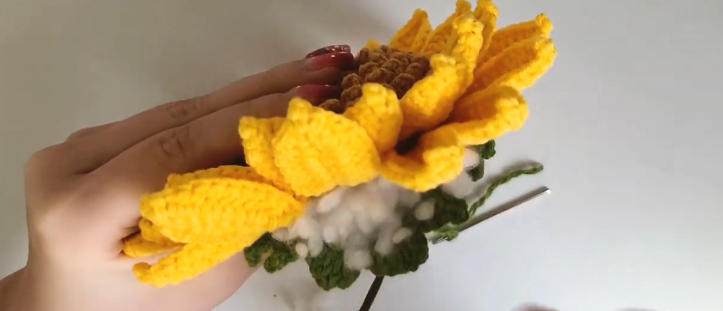
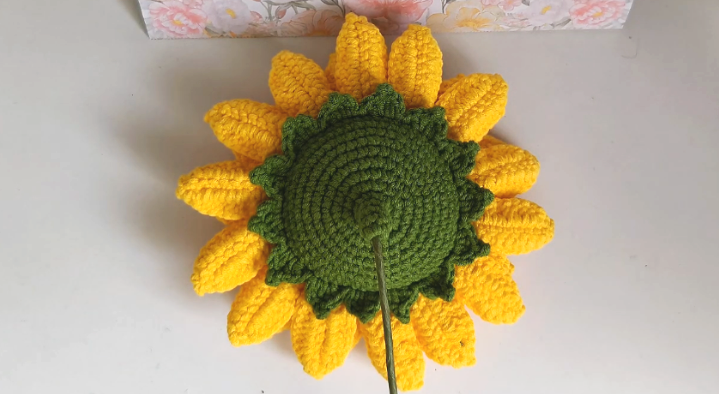
Step 3. Starting from the top of the stem, wrap yarn around the stem and attach the leaves by wrapping their wires around it.
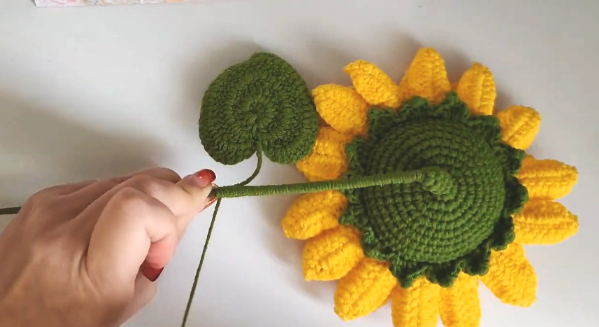
Step 4. Continue wrapping the yarn down the stem to secure everything in place. When you reach the end, fix the yarn with a small amount of glue.
💗 Share Your Creation
I would love to see your finished sunflower! Share your creation on Instagram and tag @SylvaWeave.crochet.
More Crochet Patterns
Love making crochet flowers? Discover more free patterns, detailed tutorials and crochet designs from SylvaWeave.
Pattern © SylvaWeave. This pattern is for personal use only. Please do not copy, redistribute or resell this pattern. If you sell finished items made from this pattern, please credit SylvaWeave.
4 Comments
Comments are closed.